F5 HTTPS 双向认证配置
背景:用户希望通过F5实现 HTTPS 双向认证
一、环境介绍🌳
1、前期准备
🐳 F5 负载均衡器环境
🐟 服务器证书和key
🐠 客户端ca证书和key
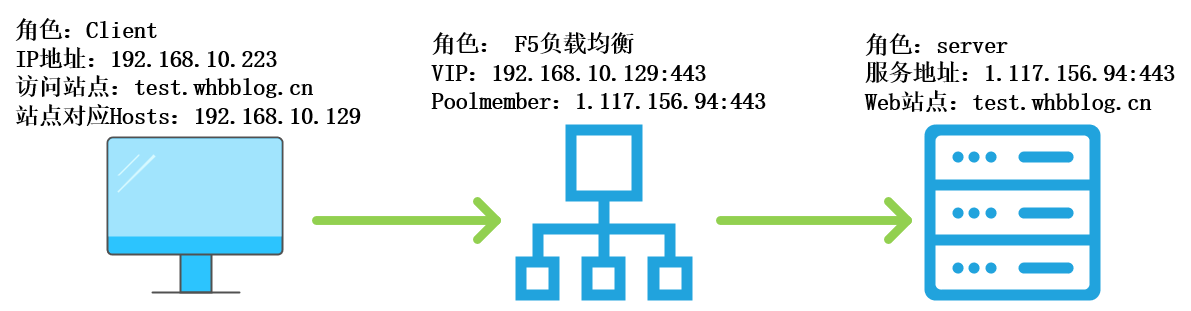
2、实验拓扑
二、实战配置🌿
1、客户端证书生成
🍉如果没有客户端证书和根证书,请使用以下方式进行自签发证书,如果有则省略此步骤。
(1)自签发根证书和客户端证书
a.创建并进入操作目录
1 | mkdir /certificate |
b.生成根证书私钥
1 | openssl genrsa -out client-ca.key 2048 |
c.自签发根证书
1 | openssl req -x509 -new -nodes -key client-ca.key -subj "/CN=client-ca" -days 5000 -out client-ca.crt |
d.生成客户端私钥
1 | openssl genrsa -out client.key 2048 |
e.创建客户端证书签名请求文件
1 | openssl req -new -key client.key -subj "/C=CN/ST=Bei Jing/L=Bei Jing/O=YYDS Space Company/CN=yyds.space" -out client.csr |
f. ext 文件配置
1 | cat > client.ext << EOF |
g.使用根证书签发客户端证书
1 | openssl x509 -req -in client.csr -CA client-ca.crt -CAkey client-ca.key -CAcreateserial -extfile client.ext -out client.crt -days 5000 |
h.创建客户端PKCS12证书
1 | openssl pkcs12 -export -in client.crt -inkey client.key -out client.p12 -name "client pkcs12" |
(2)服务器端证书生成
🍊如果没有服务器端证书和根证书,请使用以上方式进行自签发证书,如果有则省略此步骤。
2、F5 配置
(1)上传证书文件
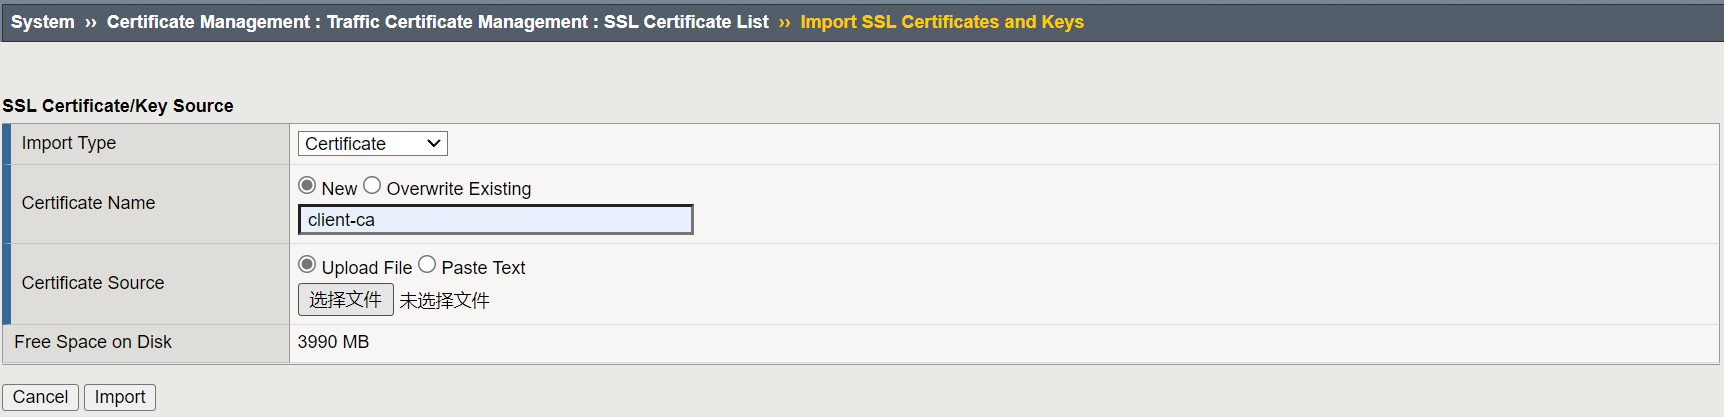
a.上传客户端ca证书
导航至 System ›› Certificate Management : Traffic Certificate Management : SSL Certificate List ›› Import SSL Certificates and Keys路径,点击Import进行客户端证书上传。
🫐Import Type:选择Certificate。
🍓Certificate Name:输入client证书名称。
🍑Certificate Source: 选择文件或者粘贴证书。
🍇最后点击下面Import即可。
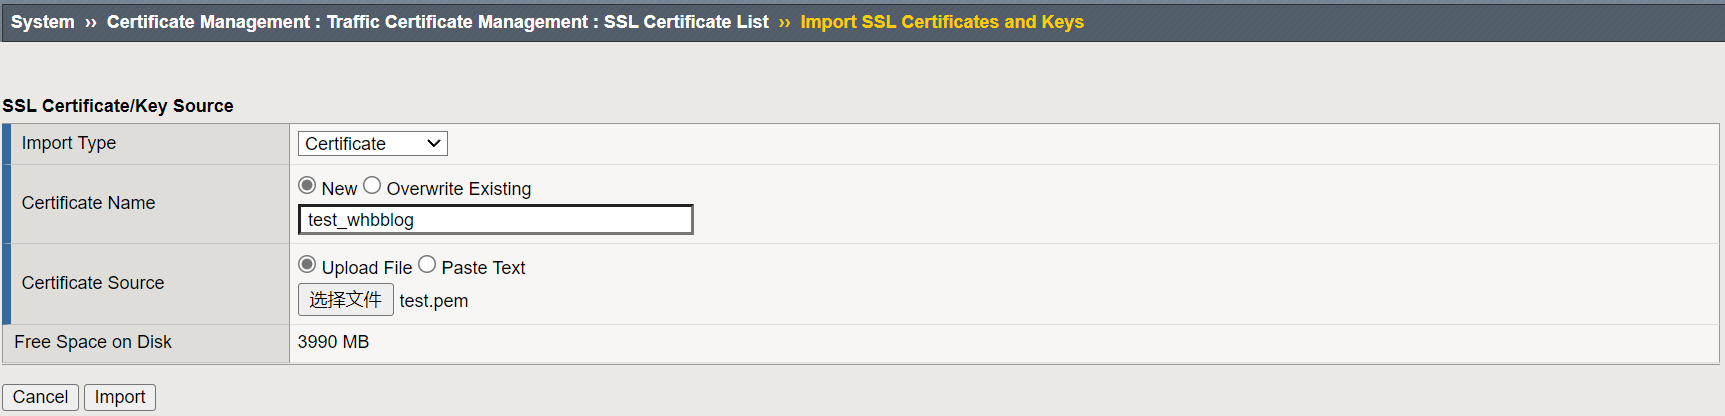
b.上传服务器证书和key
导航至 System ›› Certificate Management : Traffic Certificate Management : SSL Certificate List ›› Import SSL Certificates and Keys路径,点击Import进行客户端证书上传。
🍏Import Type:选择Certificate。
🍎Certificate Name:输入client证书名称。
🍍Certificate Source: 选择文件或者粘贴证书。
🍅最后点击下面Import即可。
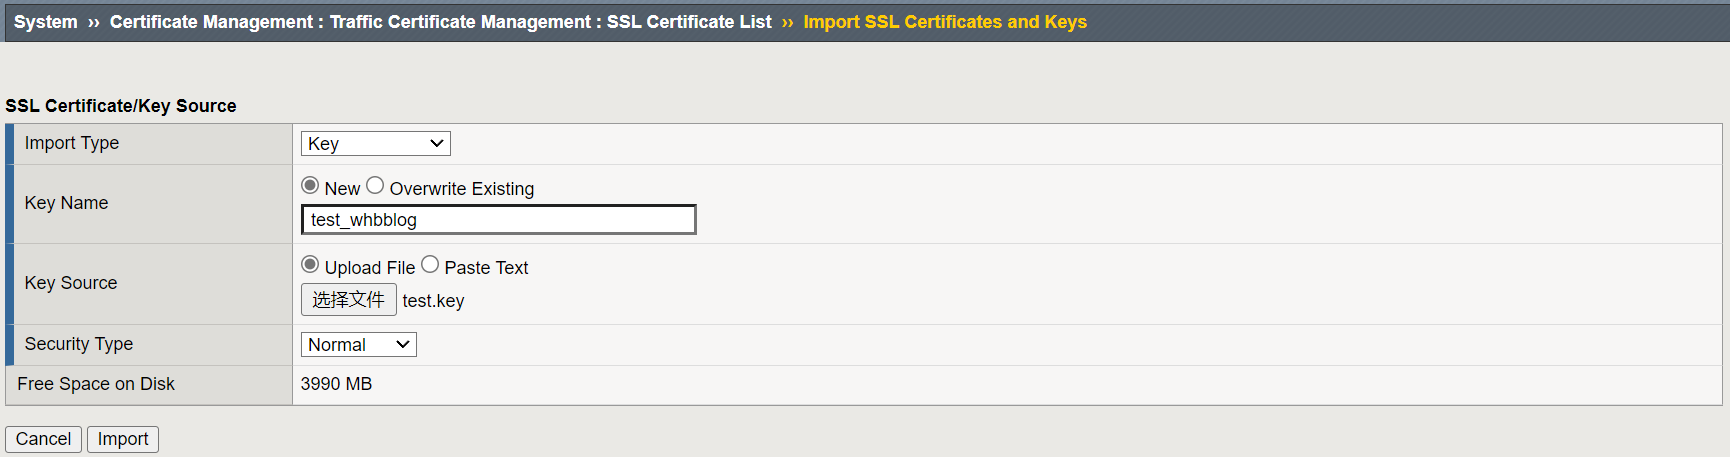
导入客户端私钥:
🍅Import Type:选择Key。
🍍Certificate Name:输入client Key名称,与Certificate保持一致。
🍏Certificate Source: 选择文件或者粘贴Key。
🍐最后点击下面Import即可。
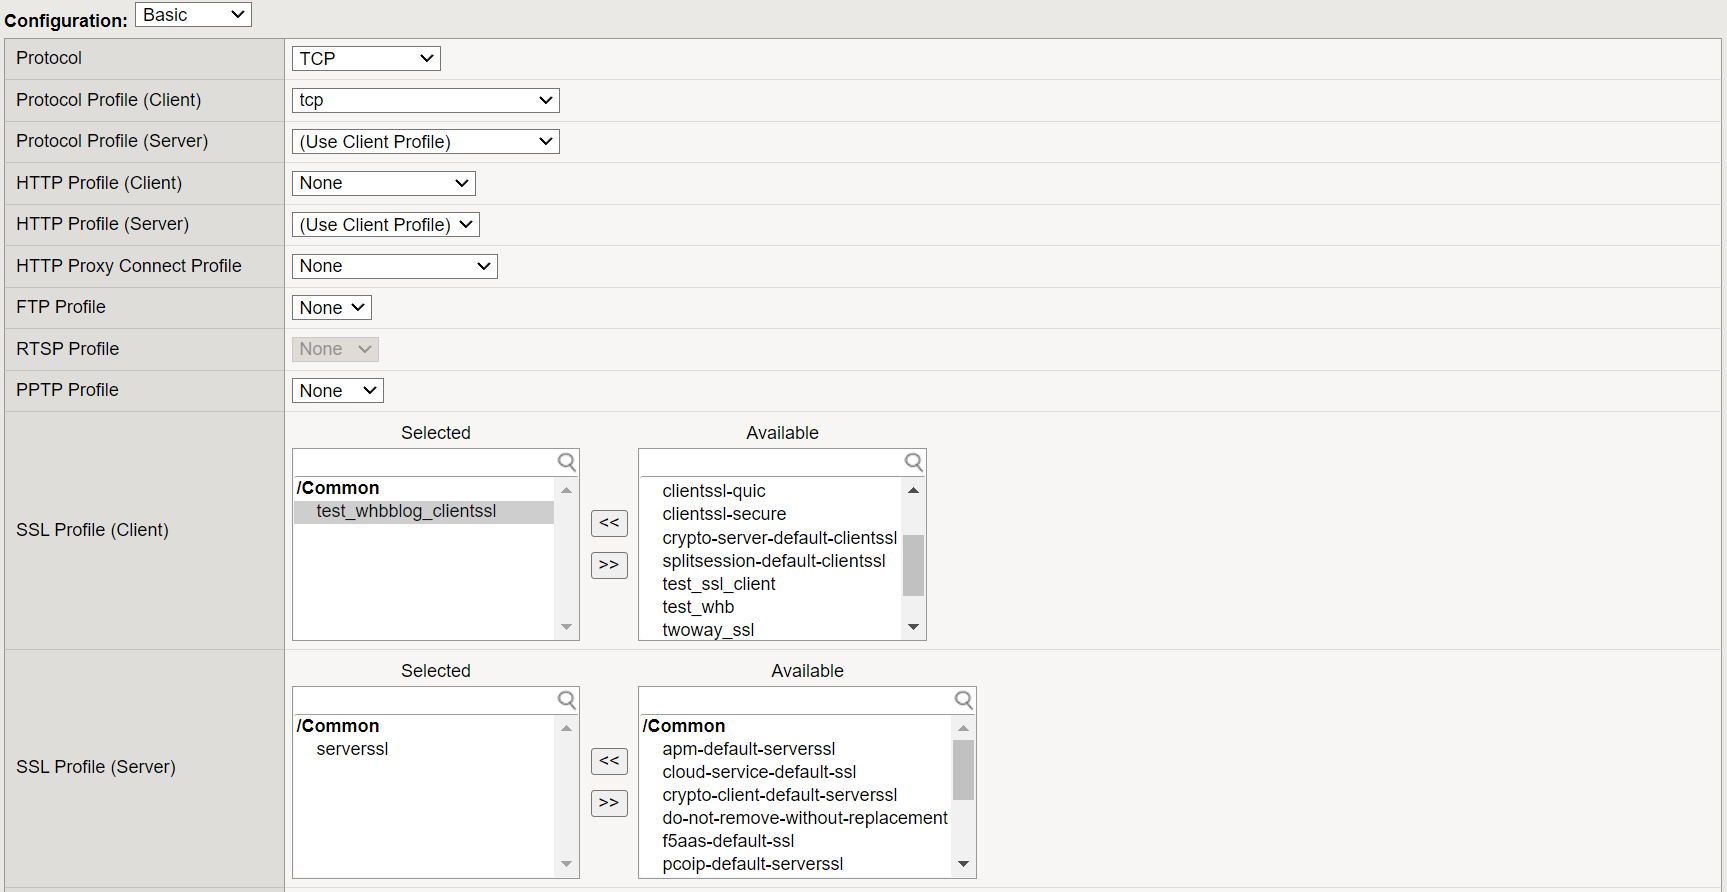
(2)创建 client ssl profile
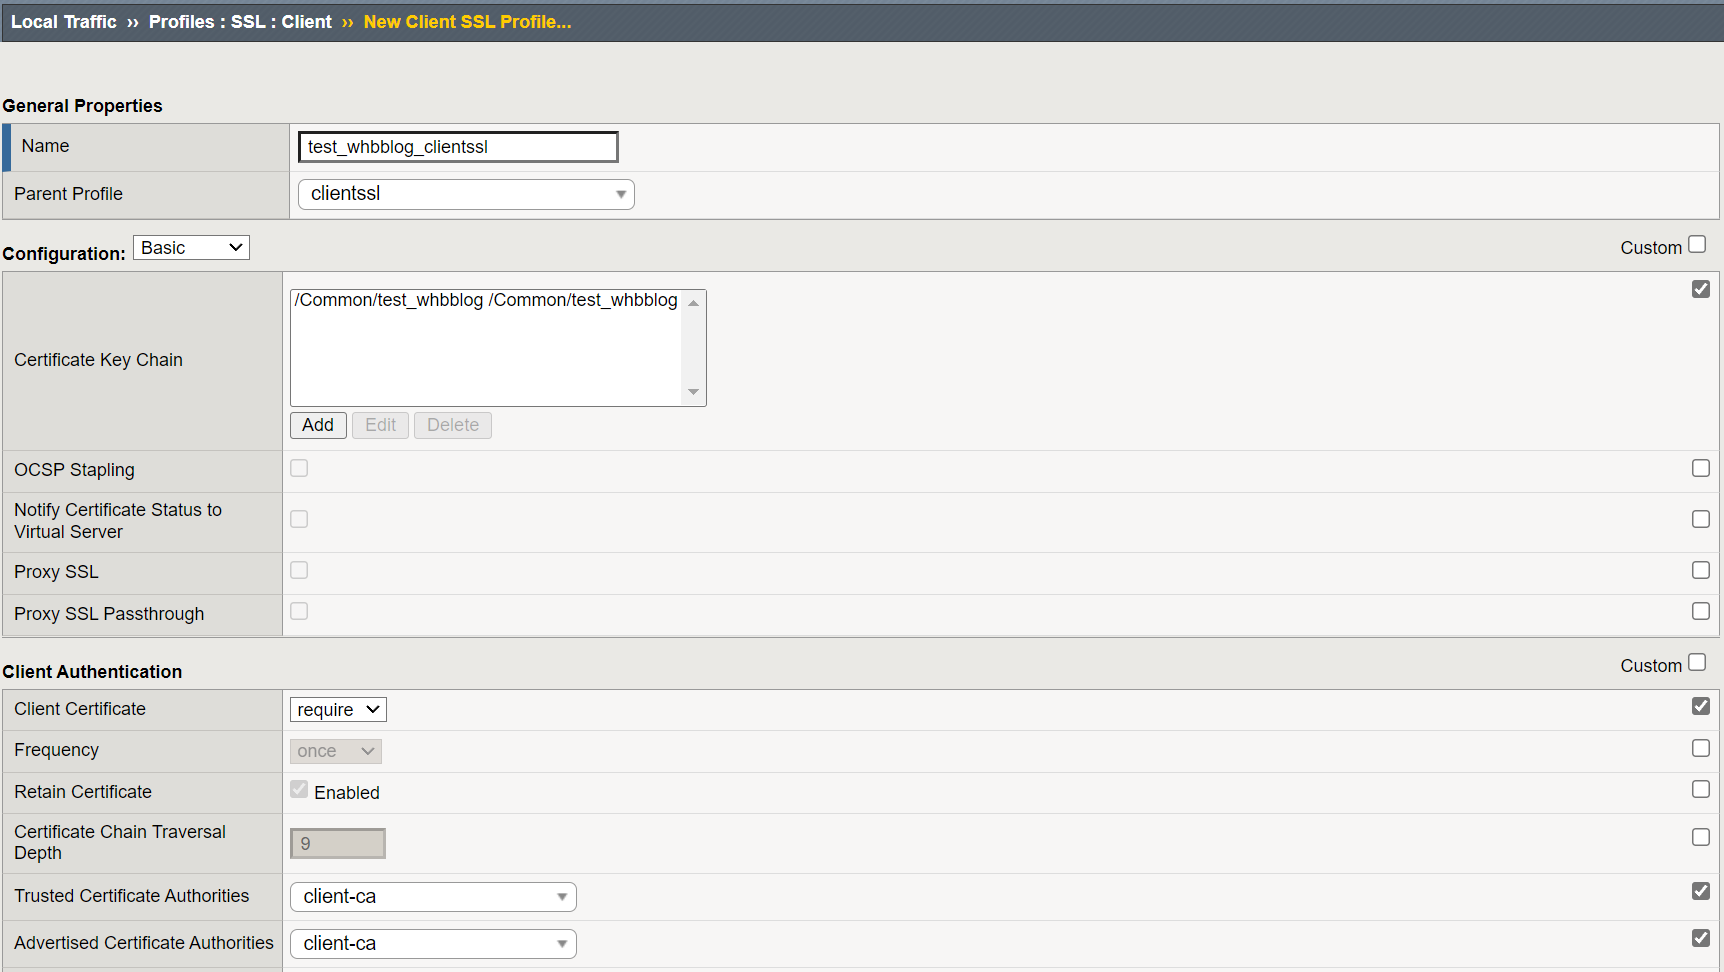
🥑Certificate Key Chain : 选择服务器证书和key.
🍆Client Certificate : 指定系统处理客户端证书的方式,这里选择Require.
🥕Trusted Certificate Authorities:受信任的证书颁发机构,用于系统验证客户端的CA证书,这里选择上传的客户端证书.
🌽Advertised Certificate Authorities(可选):将 BIG-IP 系统通告的 CA 证书关联到远程客户端,以帮助选择正确的客户端证书,这里选择上传的客户端证书.
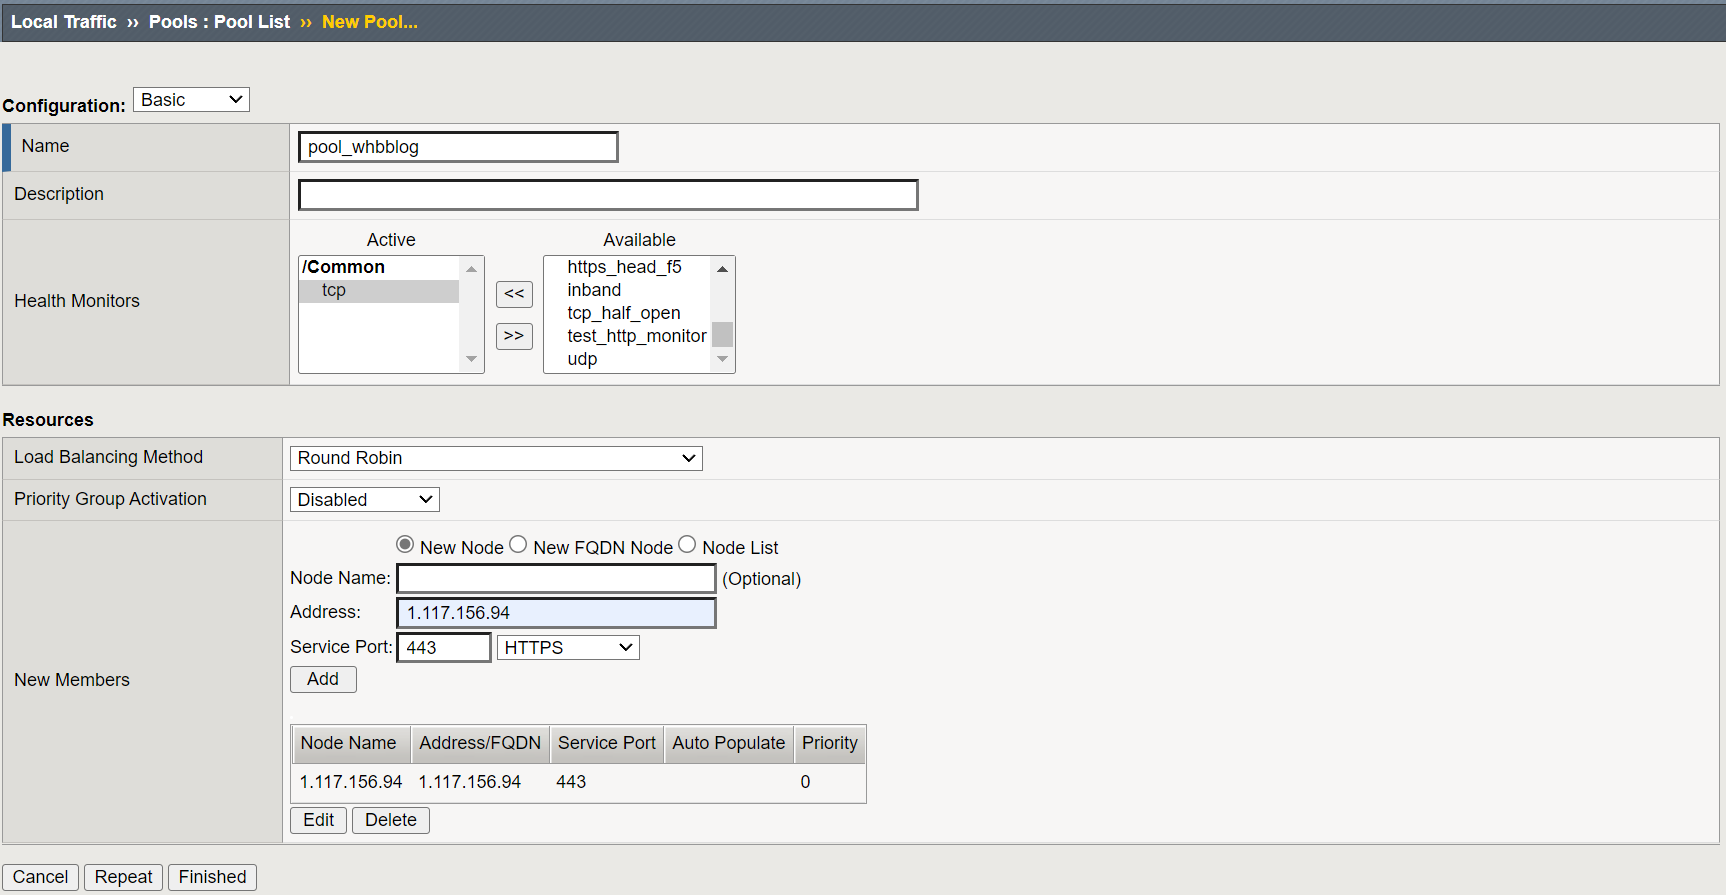
(3)创建pool
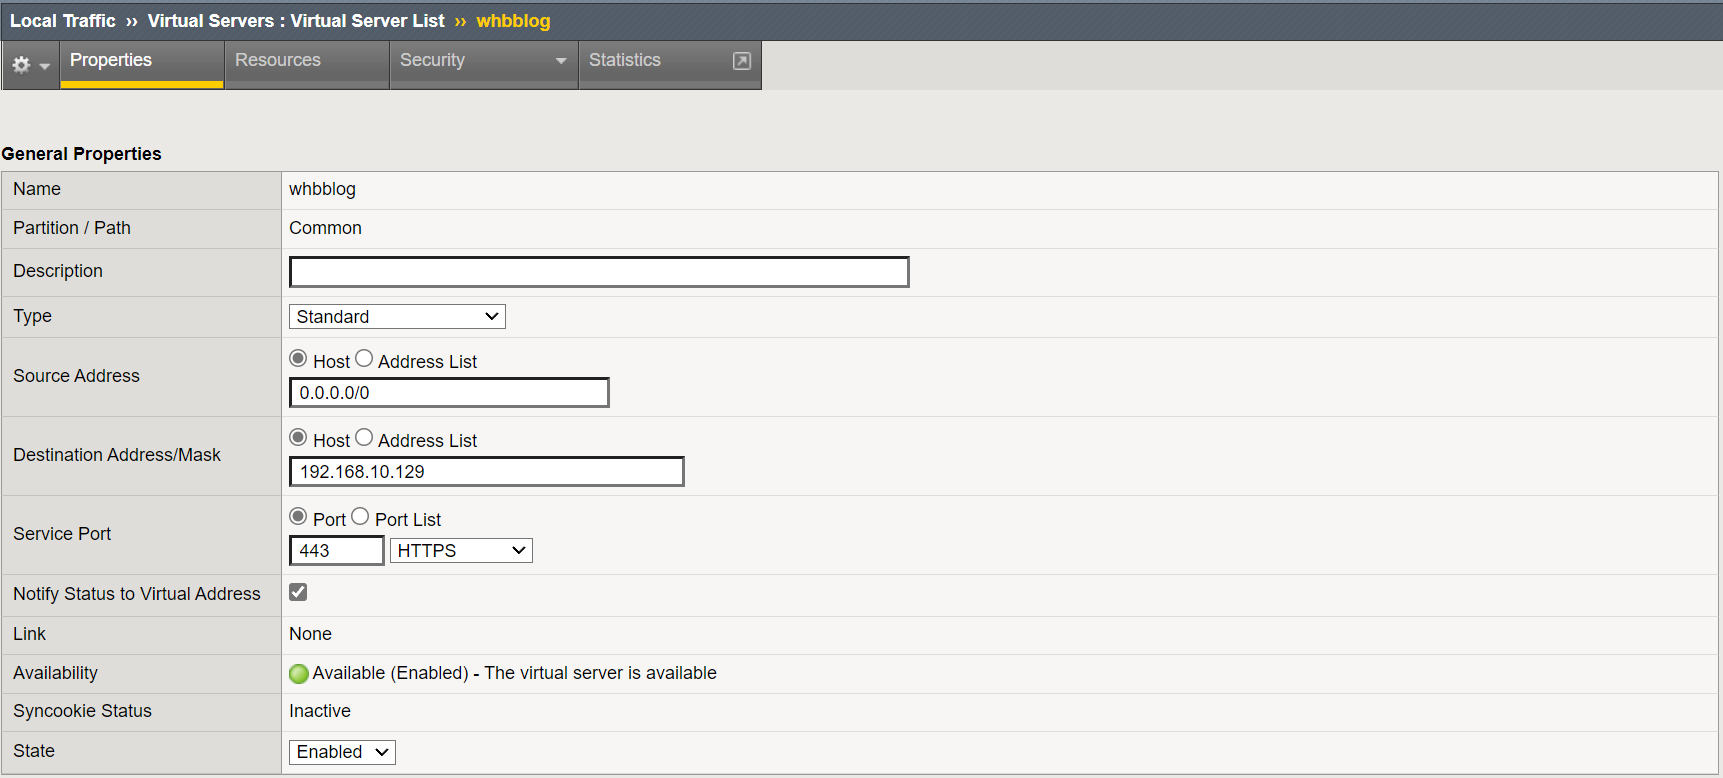
(4)创建vs,并关联 SSL Profile (client)


3、服务器操作
服务器具体操作此处省略,大致操作如下:
🍒 配置ssl证书(根据情况)
🍎 开放访问策略
三、验证分析🌴
1、Linux客户端验证
(1)修改本地hosts文件
🥦由于本次测试为内网环境测试,所以手动进行修改hosts文件操作。
1 | echo "192.168.10.129 test.whbblog.cn" >> /etc/hosts |
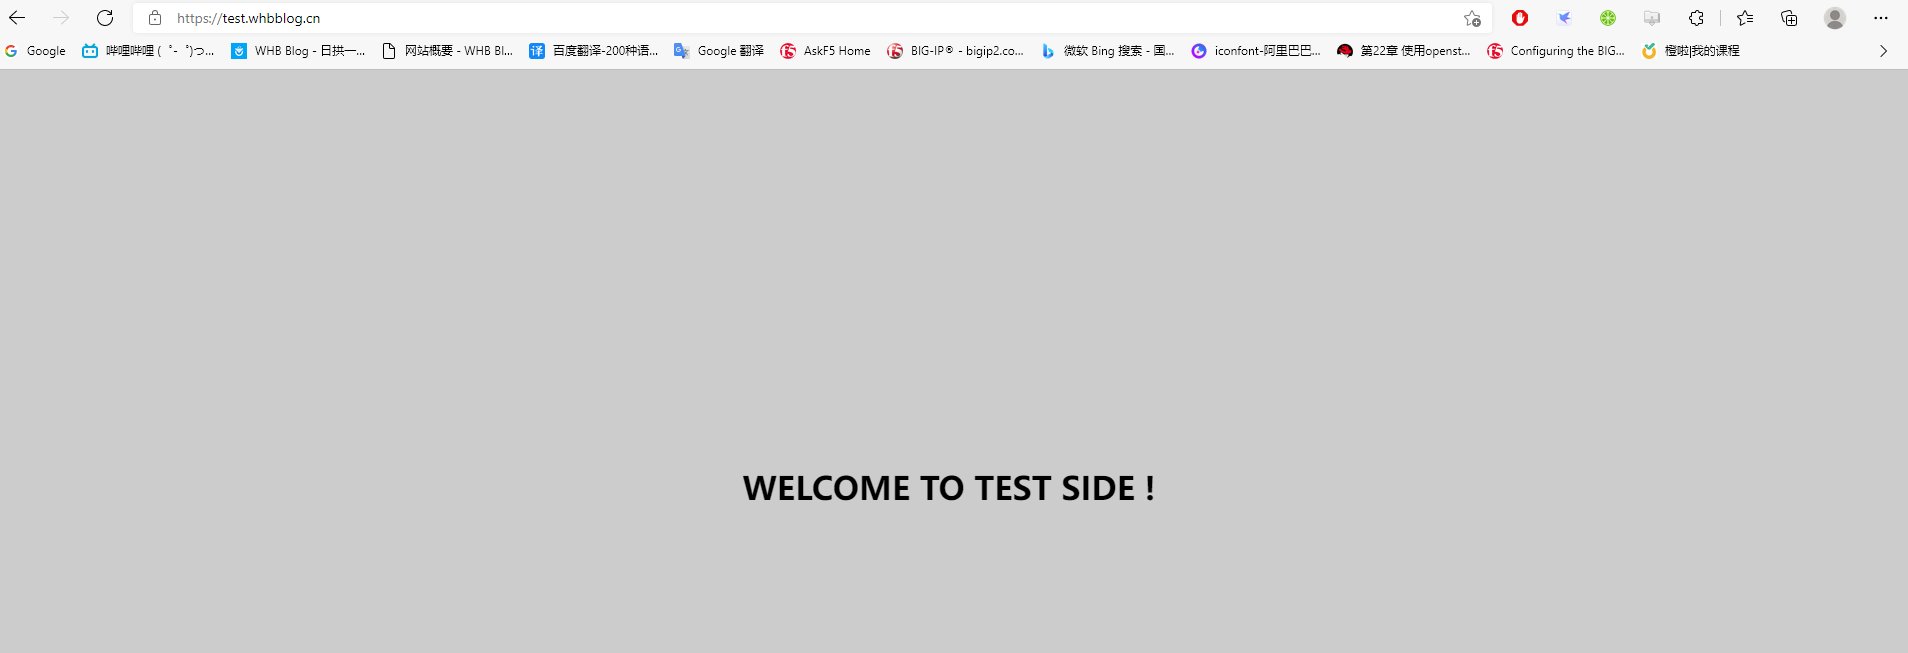
(2)客户端访问验证
1 | [root@localhost certificate]# curl https://test.whbblog.cn --cert /certificate/client.crt --key /certificate/client.key |
(3)抓包验证双向认证过程

结论:由以上抓包结论得知,F5 HTTPS 双向认证配置成功。
2、Linux客户端验证
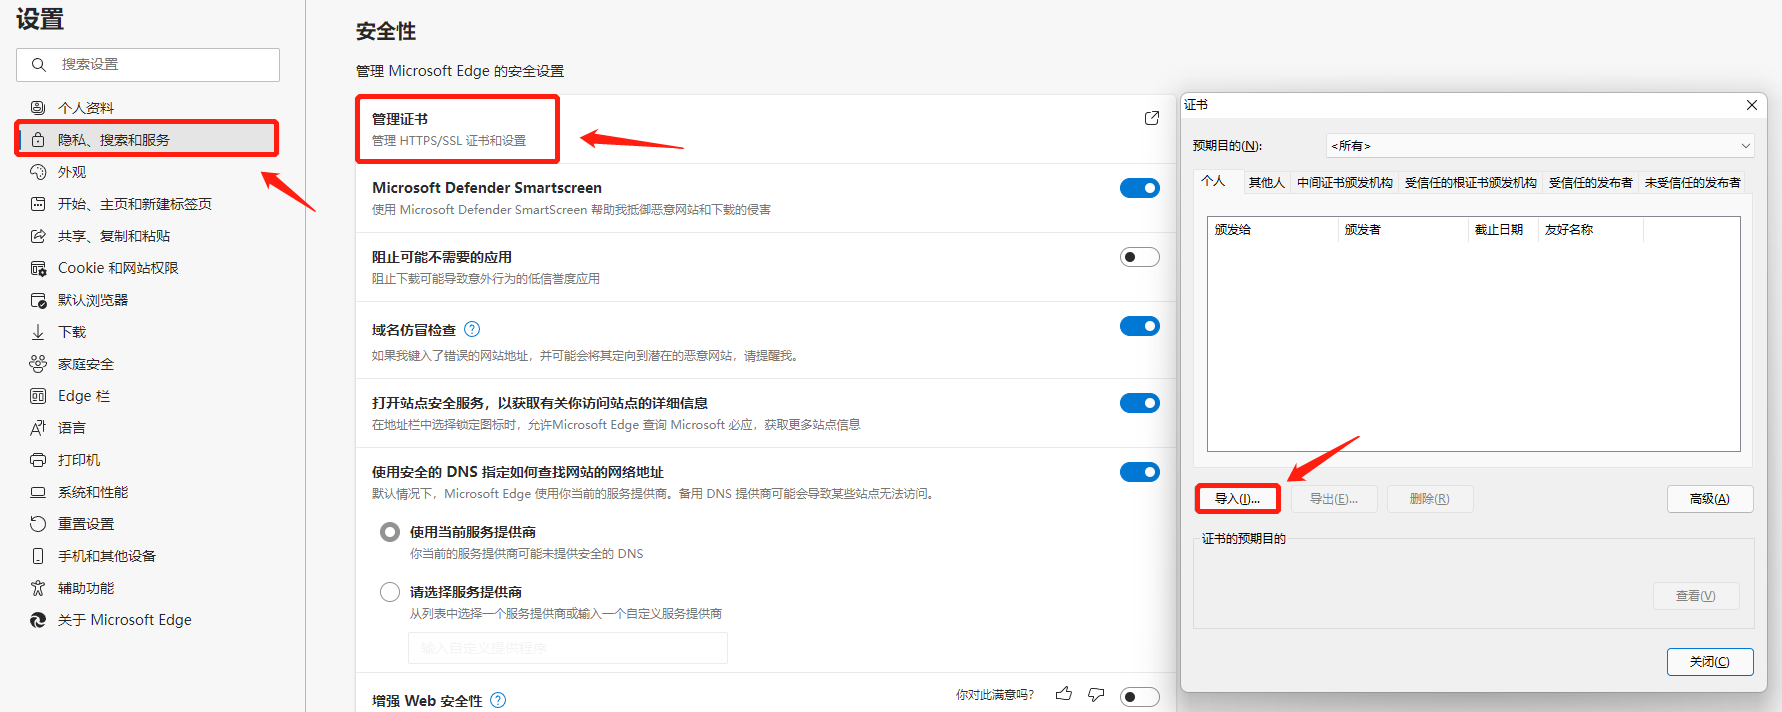
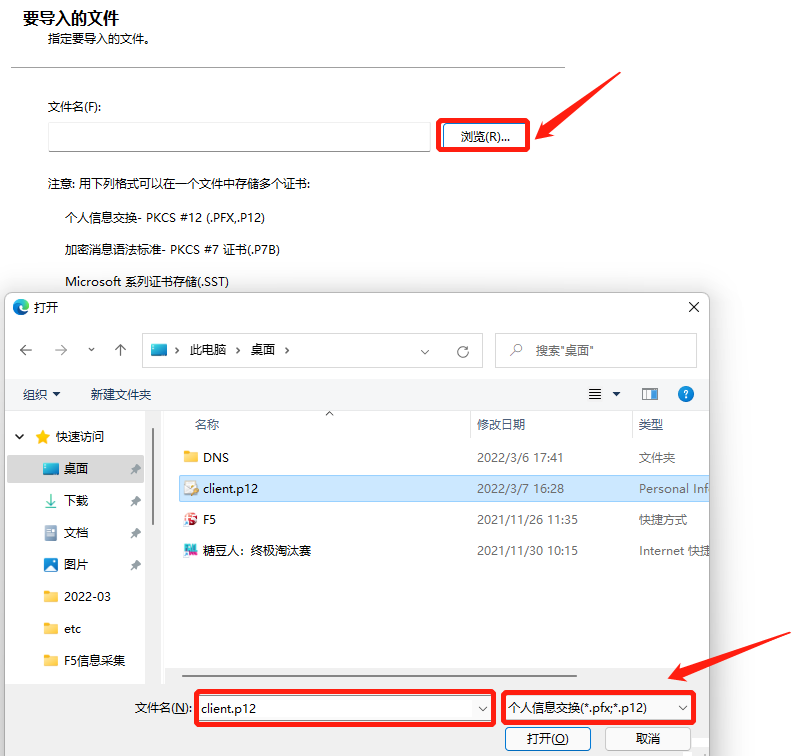
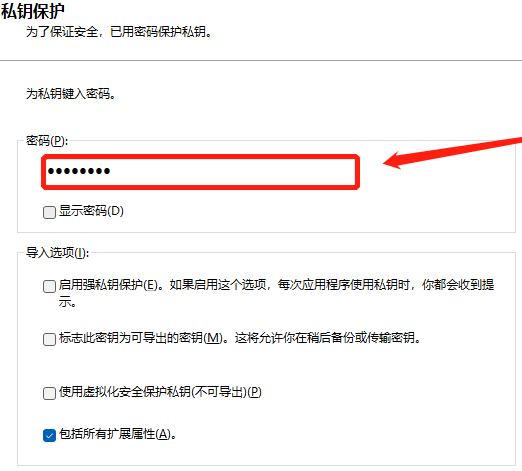
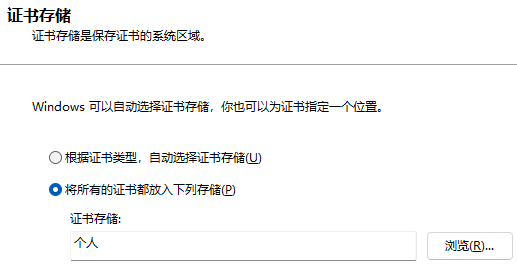
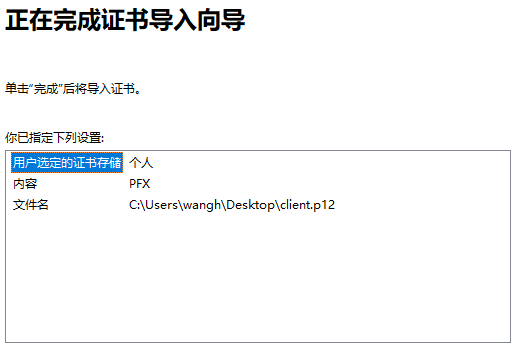
(1)上传证书至浏览器
(2)访问测试