
F5 HTTPS 证书卸载
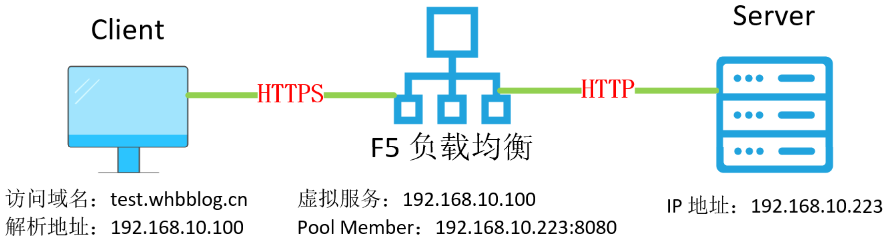
背景:客户端访问 F5 虚拟服务,通过 F5 虚拟服务做证书卸载,把明文信息传递给后端服务器,减小服务器的压力。
一、环境介绍🌻
1、前期准备
🍃 F5 LTM 环境
🍃 服务器证书和私钥
2、实验拓扑
二、F5 配置步骤🥝
1、证书和私钥上传至 F5
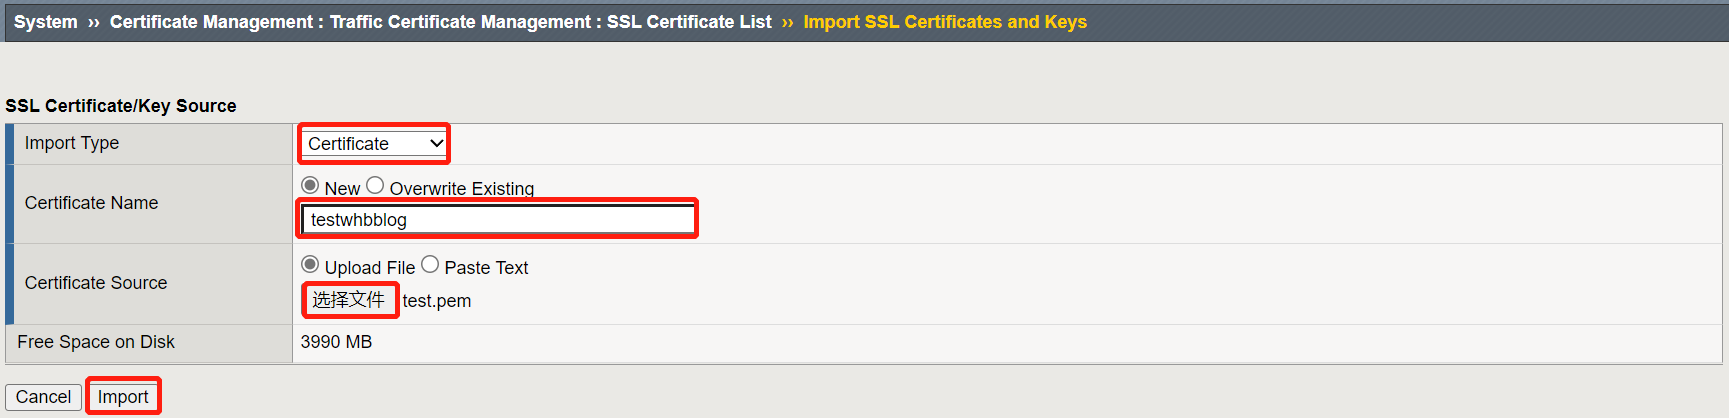
导航至 System ›› Certificate Management : Traffic Certificate Management : SSL Certificate List 路径,点击Import进行证书和私钥导入。

(1)上传证书
Import Type : Certificate 选择 Certificate 类型进行证书导入。
Certificate Name : testwhbblog 输入证书名称
Certificate Source : 选择证书上传,也可以粘贴文本
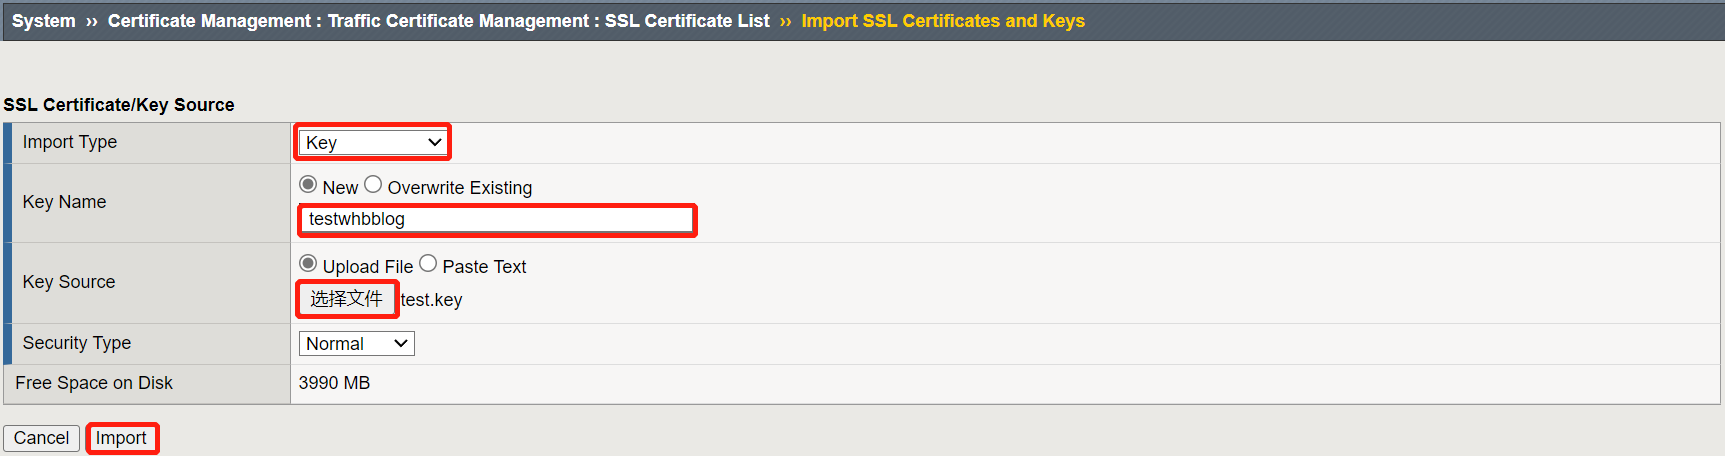
(2)上传私钥
Import Type : Key 选择 Key 类型进行私钥导入。
Certificate Name : testwhbblog 输入私钥名称,和证书名称保持一致
Certificate Source : 选择私钥上传,也可以粘贴文本
2、创建 Client SSL Profile
导航至 Local Traffic ›› Profiles : SSL : Client 路径,点击 Create 进行 Client SSL Profile 创建。

(1)配置 Client SSL Profile
Name : 输入 Client SSL Profile 名称
Parent Profile : 选择 clientssl
Certificate Key Chain : 选择证书。
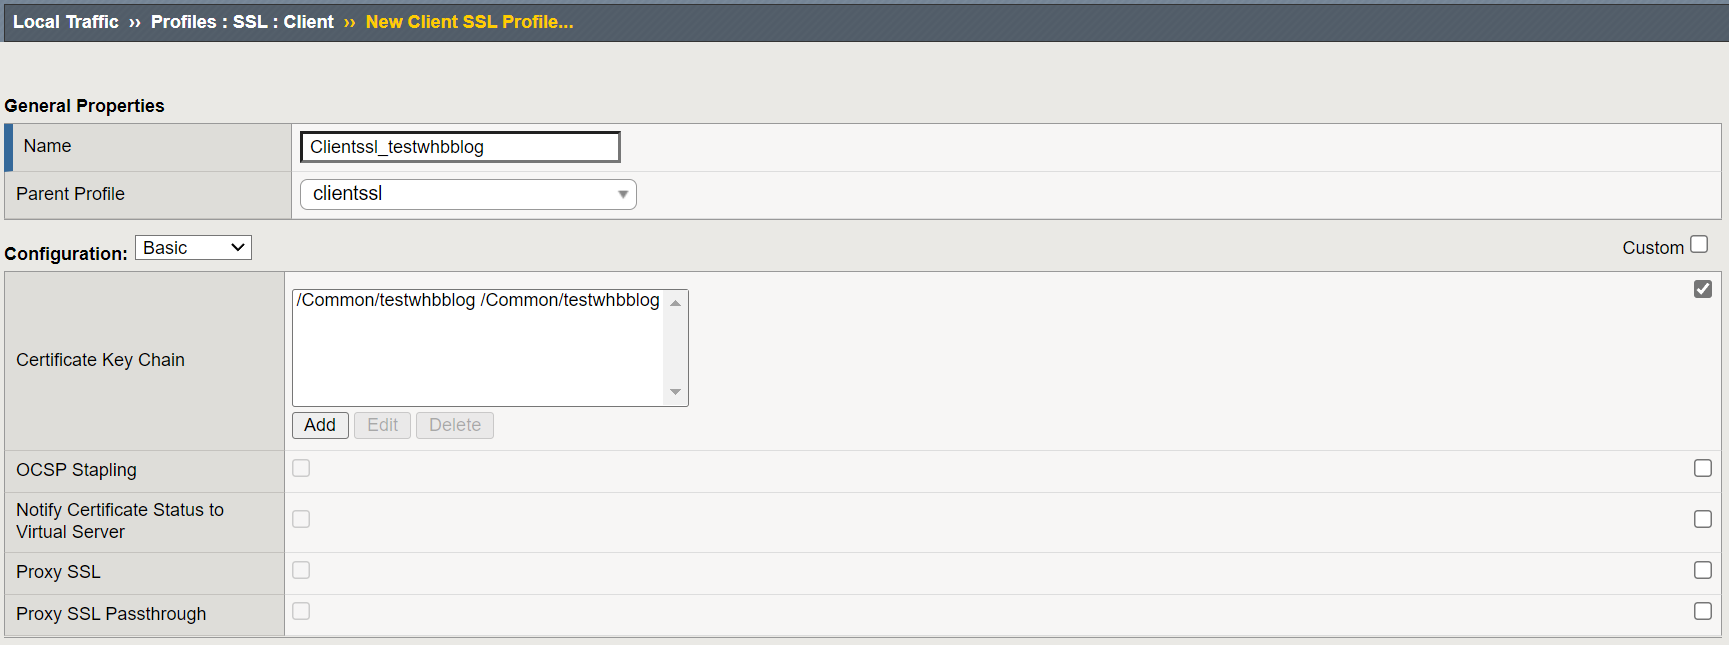
添加证书

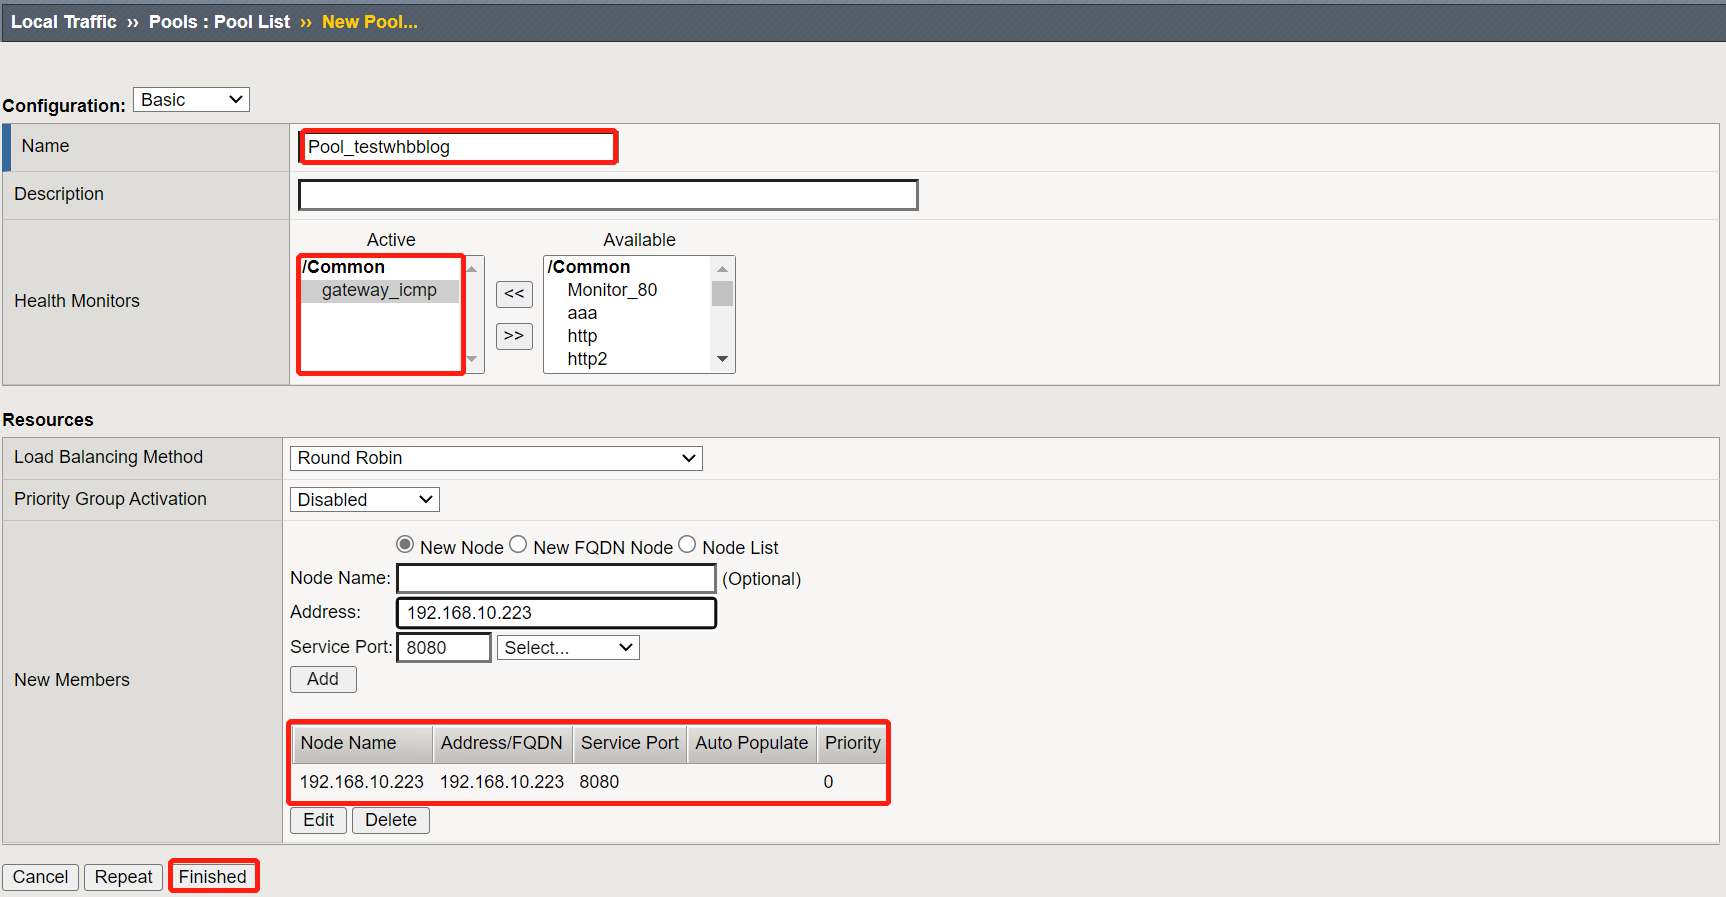
3、创建 Pool
Name : Pool名称
Health Monitor : 选择健康检查方式
New Members : 输入后端服务。
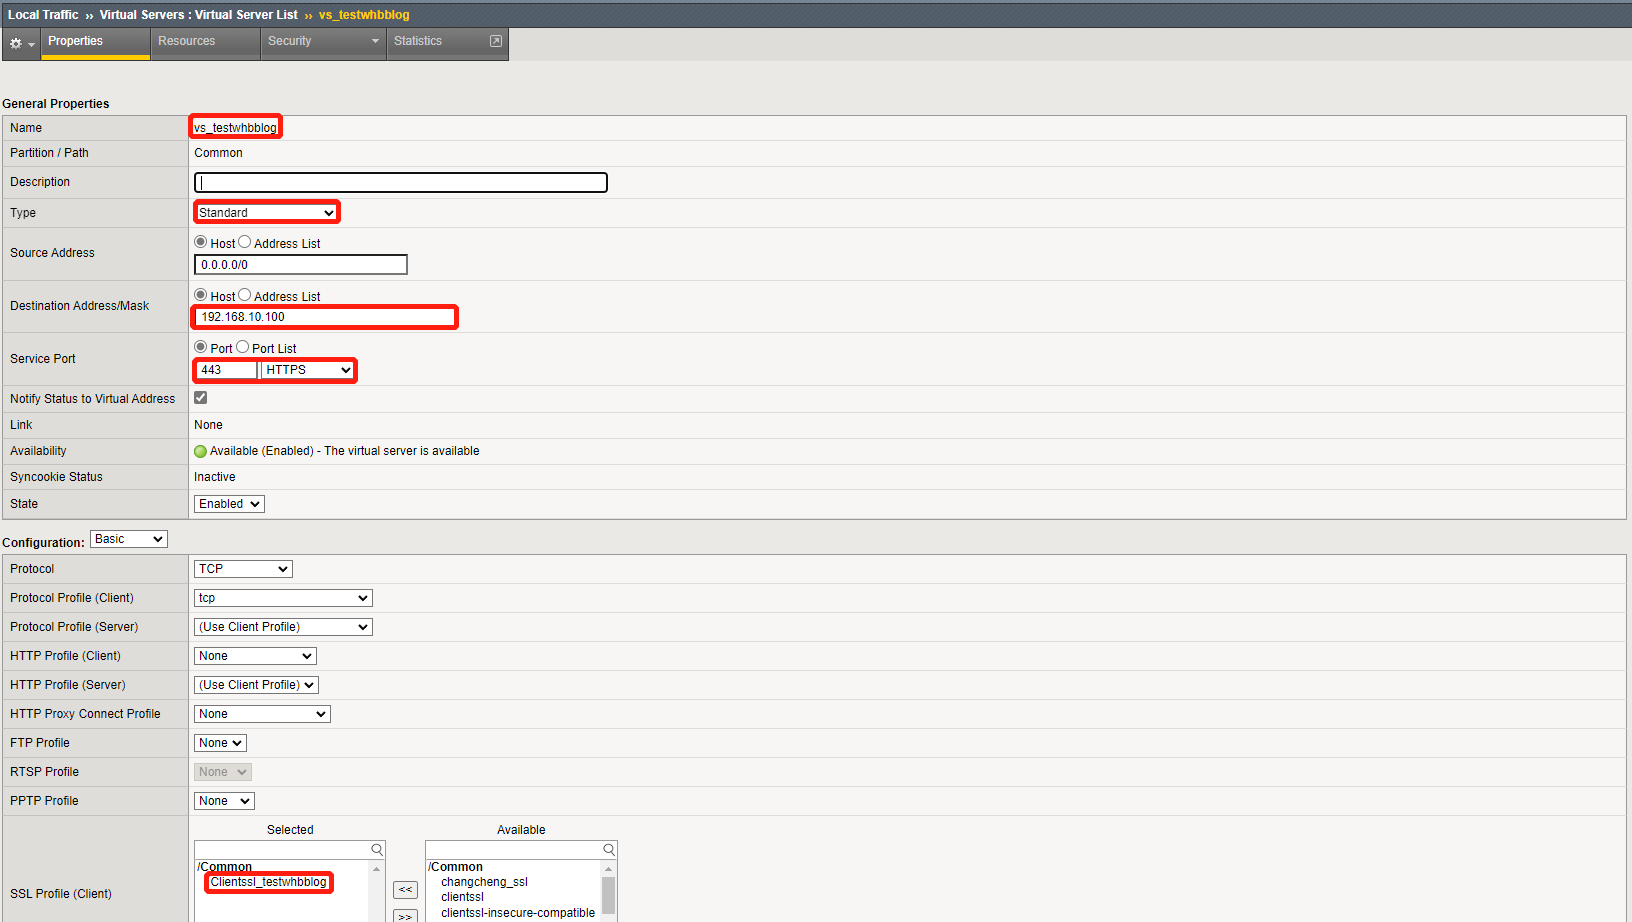
4、创建 Virtual Server
Name : 虚拟服务名称
TYPE : 虚拟服务类型,这里需要选择 Standard 类型。
Destination Address/Mask : 虚拟服务地址。
Service Port : 虚拟服务地址提供的服务端口。
SSL Profile(Client):客户端证书卸载配置文件。
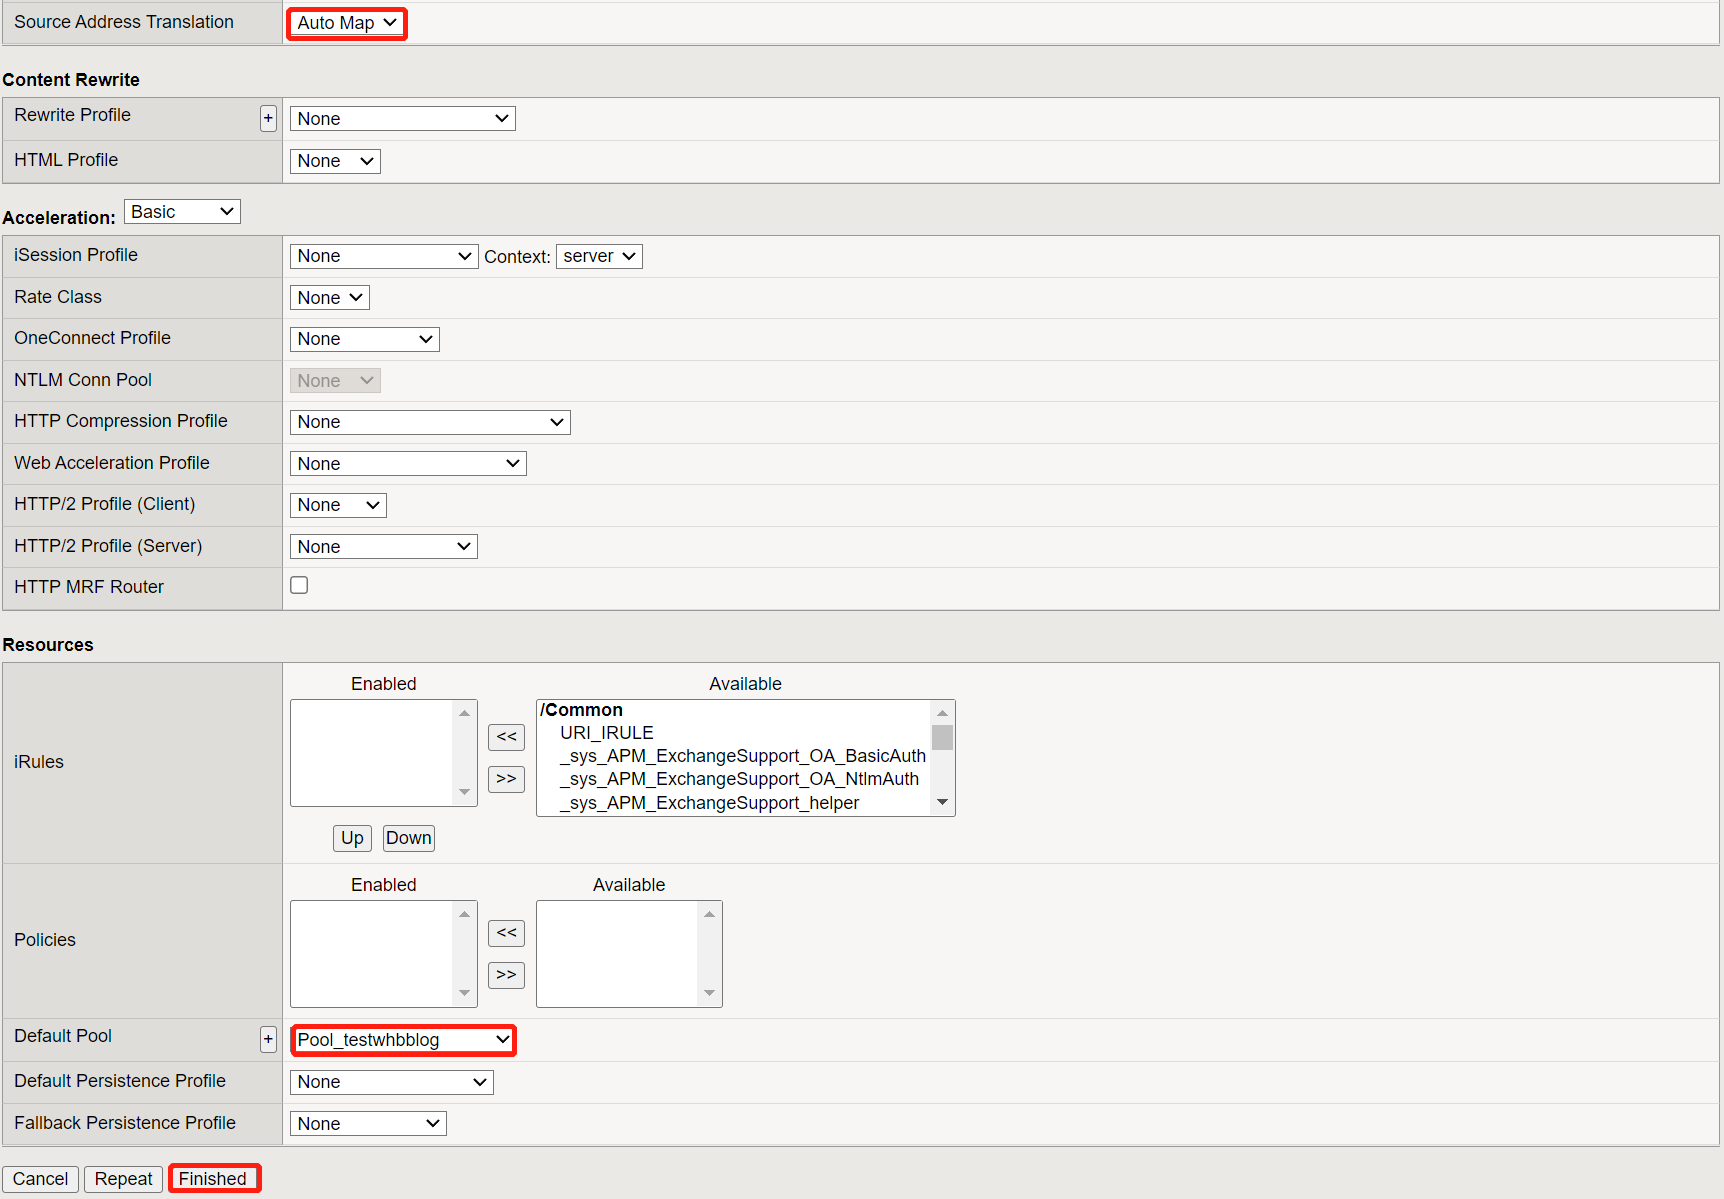
Source Address Translate : Auto Map(根据情况进行选择)。
Default Pool : 后端服务器资源池。
三、验证测试🍉
1、修改 Hosts文件
由于测试环境问本地内网环境,测试时修改hosts文件,增加内容如下:
1 | 192.168.10.100 test.whbblog.cn |
2、访问测试
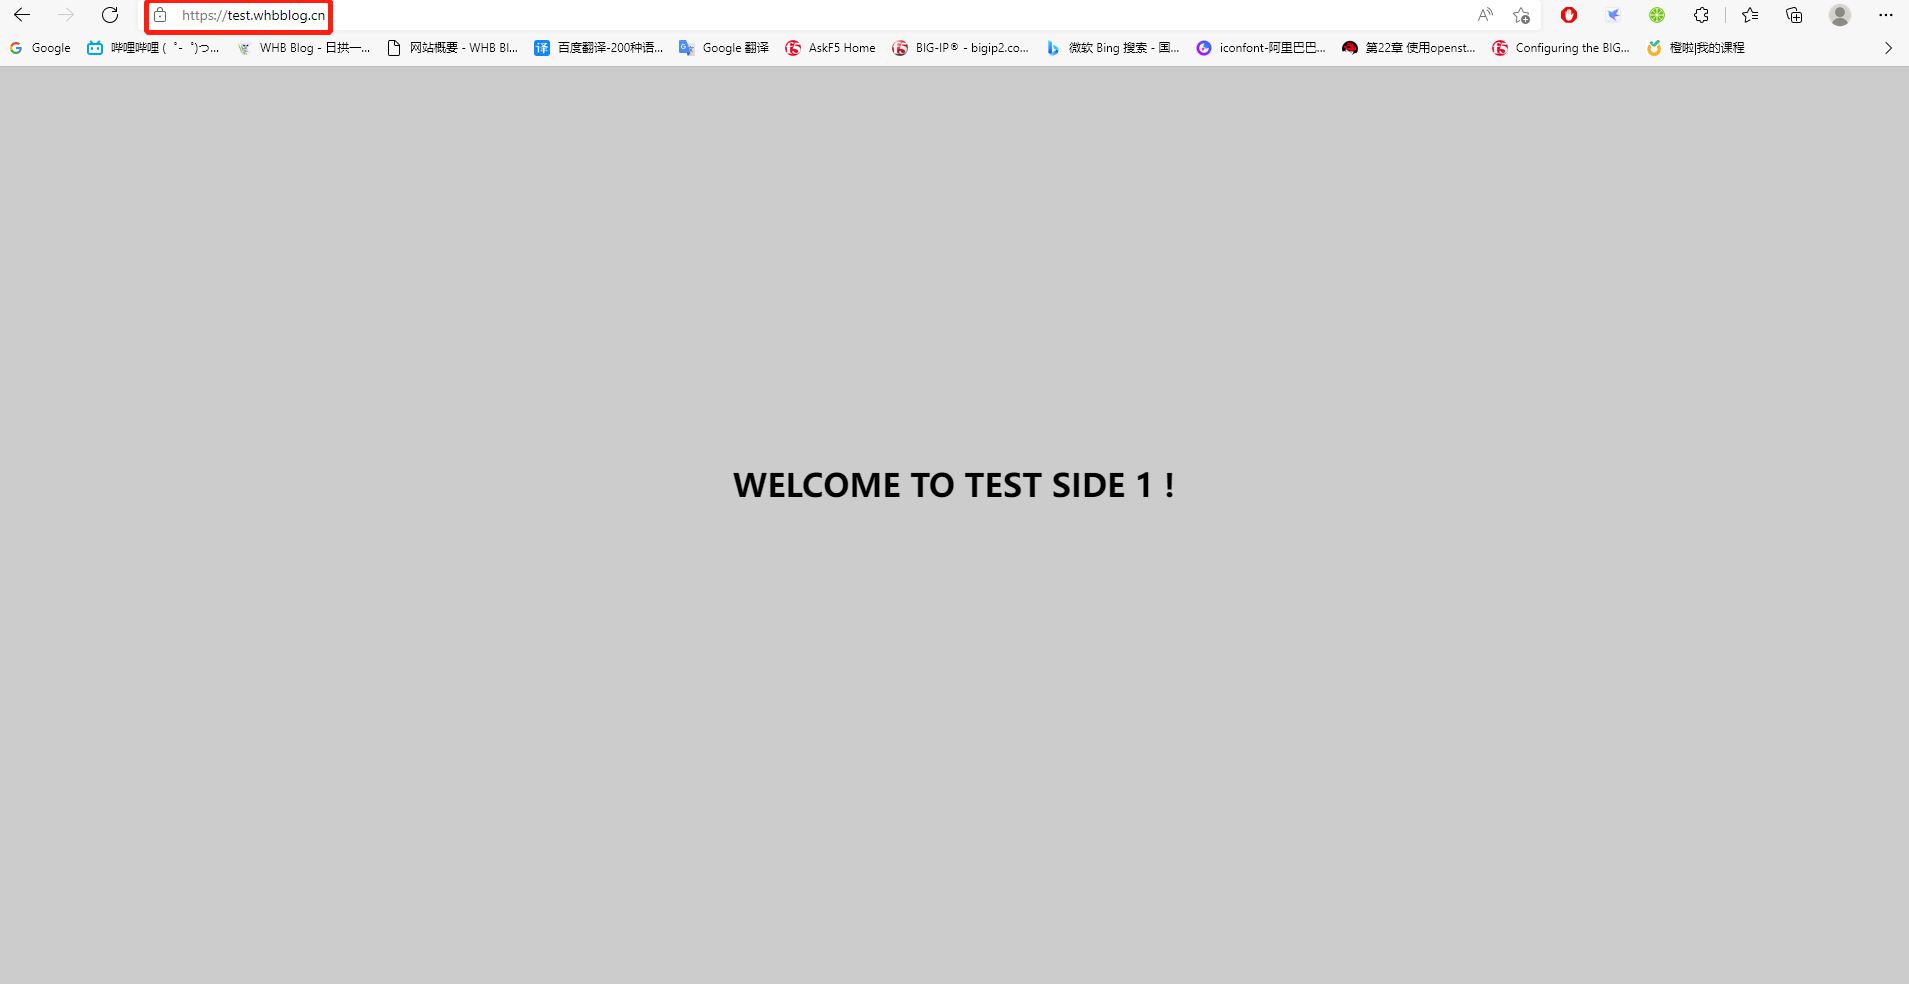
测试完成,网站可以正常访问


